

Create new page
| Table of contents |
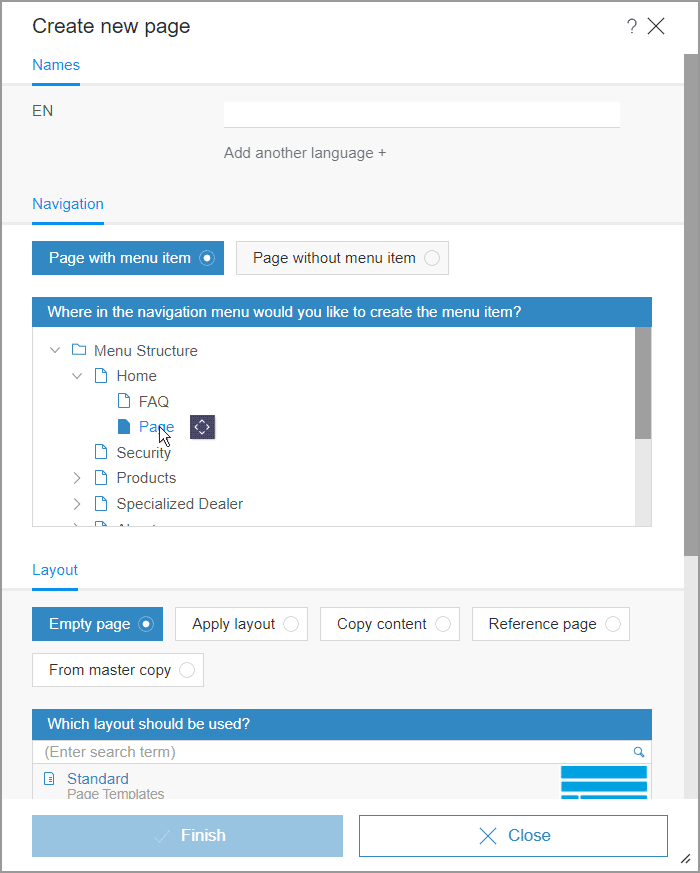
Calling the New - Create new page function opens a dialog for adding a new page to the website's navigation.
All of the settings required for adding a new page can be made here.
Functions concerning pages are also offered by the Navigation view (e.g. renaming pages, moving them in the structure).
Names
A name can be specified for the page for each project language. By default, this name is also used for labeling the menu item that is created. However, it can be changed later as needed at any time (see the Navigation page). The page can also be found under this name, for instance, in selection dialogs.
The name for the master language is always the default setting.
Add another language: Names for other project languages can be specified using this link.
At the very least, a name always has to be specified for the master language.
See also page Use of multiple languages.
Navigation
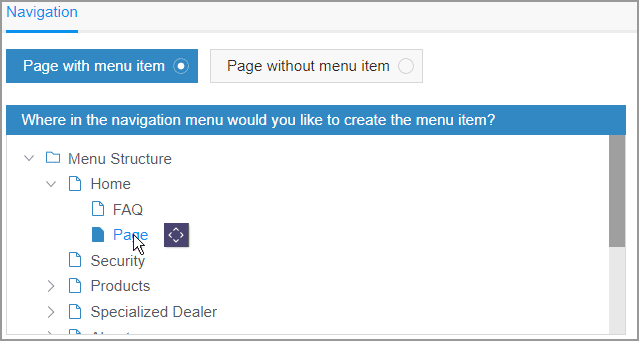
The position where the new page is to be created in the website's navigation is specified in this area.
By default, the new page is created with its own new menu item. In this case, the new page is added underneath the page currently selected in the navigation. The name of the new page appears at the predefined position in the displayed navigation.
The new menu item (with new page) can be dragged to another spot in the navigation using the ![]() icon with the left mouse button held down.
icon with the left mouse button held down.
The Page without menu item has to be selected if the new page is not to be incorporated into the navigation via its own menu item.
(See also options “Convert menu item to page” and “Convert page to menu item” in the PAGE menu.)
Layout

The appearance for each page has to be defined. This is done principally by selecting what is known as a page template. Available templates are listed with a small preview in order to provide guidance to help you select the right page.
The following options are available to select the layout for a new page:
Empty page: If this option is selected, then all of the page templates available to the editor are shown in the selection list (the templates selected most recently by the editor usually appear at the top of this list).
An empty page with the selected template is then added to the website.
Apply layout: If this option is selected, existing pages of the website are displayed in the selection list.
An empty page with the same layout as the selected page is then added to the project.
Copy content: If this option is selected, existing pages of the website are shown as templates in the selection list.
The selected page is then added in its entirety, i.e., with all its content intact.
Reference page: If this option is selected, existing pages of the website are displayed in the selection list.
The selected page is created as a “reference” at the position in the site's navigation that is selected in the Navigation area.
The selected page is then present in both positions in the project, with the same contents. Changes to the content of either page are also reflected in the respective reference.
This option makes it easy to reuse page content elsewhere in the project.
If a page is referenced in this way elsewhere on the website, this is visualized in the title bar of dialogs (“Usages”).
From master copy: If this option is selected, all pages marked as masters in the bookmarks are shown in the selection list.
The selected page is then added in its entirety, i.e., with all its content intact.
Search field:  If the layout of a page is to be applied, the search field can be used to limit the selection for the available page.
Words or parts of words that appear on the desired page can be entered in the search field. The list of pages is thereby reduced to the possible results.
Once all settings have been made, the new page can be created by clicking Finish.
Creating pages using drag-and-drop
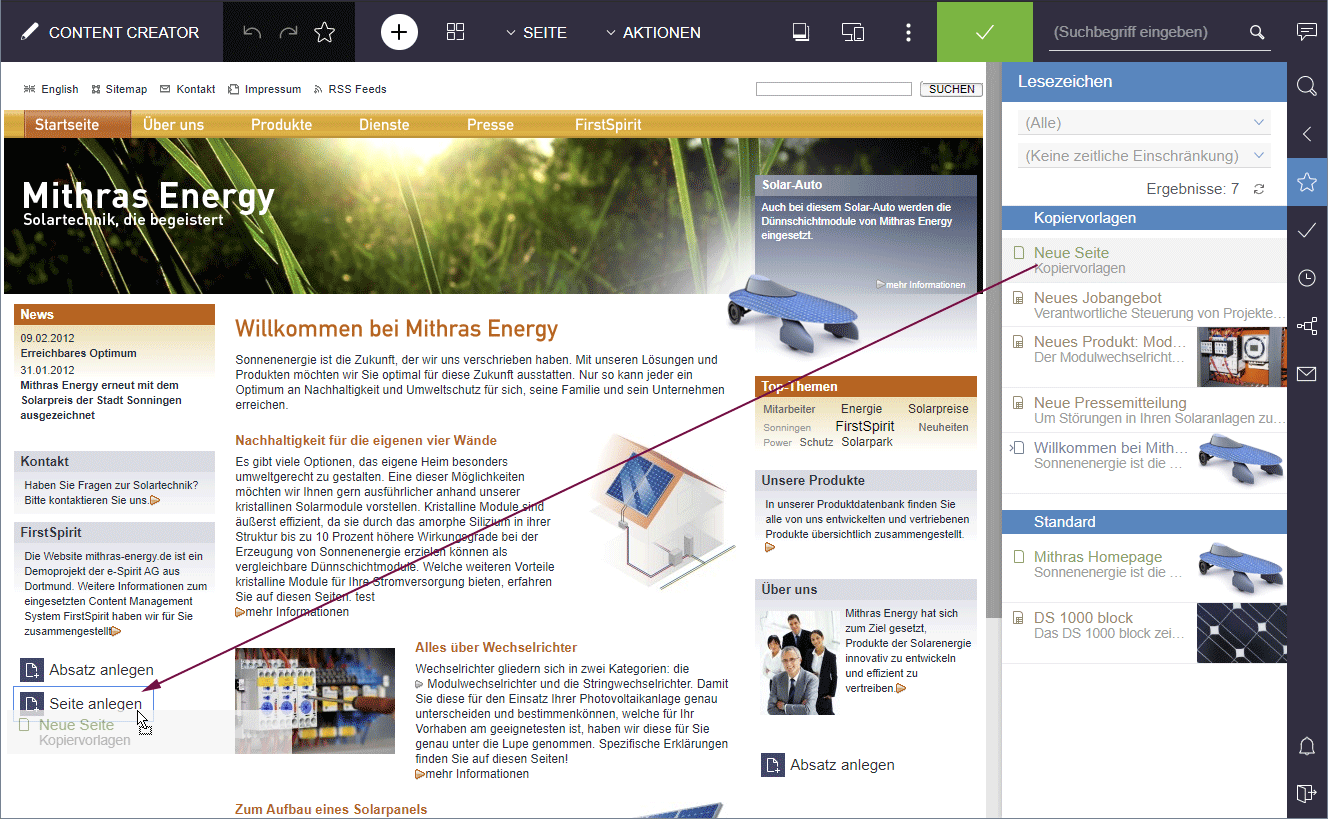
Depending on the project configuration, you can create new pages with the drag-and-drop function as well.
For this purpose, pages from the report area can be dragged onto project specific buttons or icons (e.g. ![]() ) on the preview page. As soon as the mouse button is released at the required position, the dialog for inserting a new page into the website navigation system opens (see above).
) on the preview page. As soon as the mouse button is released at the required position, the dialog for inserting a new page into the website navigation system opens (see above).
When you click “Finish”, a new page will be created within the navigation system below the current preview page with the name and the content of the dropped page. If necessary, you can change the settings for the new page in this dialog or after it has been created.
If your project developer has configured this, new pages can also be created by dragging and dropping pages onto menu items. See page Navigation.
By default, after clicking Finish a new page is created in the navigation below the current preview page with the name and content of the dropped page. If necessary, the settings for the new page can be changed in this dialog or even after the page has been created.
If configured accordingly by the template developer, new pages can also be created using drag-and-drop on menu items. See page Navigation.