

Schedule management
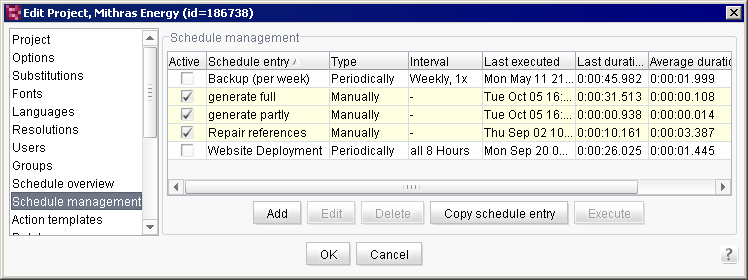
Schedule management contains all schedule entries that (depending on whether the user is in the server or project properties) were either created as server-based or project-based.
 |
Some changes to schedule entries are saved immediately without having to click on OK to confirm. This type of save is not reset if “Cancel” is used to close the dialog. |
Active: if this option is unchecked, this schedule entry will not be subject to automatic execution. This also applies to system schedule entries (in yellow). In this case the schedule entries cannot be started in SiteArchitect, since the menu entries are grayed out; this also applies to project administrators and the server administrator. Regardless of the selection for “Interactive execution”, schedule entries can be started in SiteArchitect by server and project administrators.
Schedule entry: unique name of the schedule entry. The name is defined when a new schedule entry is added.
Type: there are different types of execution methods available for schedule entries.
- Manually: schedule entry is manually executed
- Schedule entries that are executed automatically can be distinguished as follows:
- Once
- Periodically
Interval: this column shows at what interval a schedule entry will be executed. This information is only displayed for schedule entries that are automatically executed periodically:
- Daily
- Every n minutes
- Weekly, n x
- Monthly, on the nday
|
A schedule entry can be saved only after a correct starting point can be determined. If, for instance, weekly execution is configured, a weekday must also be specified. |
Last executed: this column shows the day and time the schedule entry was last executed.
Last duration: the period at which the last schedule entry was executed is displayed here.
Average duration: the average duration, as well as the “Last duration” is part of the statistical information that can be useful for scheduling time.
Schedule entry ID: unique ID for the schedule entry. The ID is assigned automatically when a new schedule entry is created.
Clicking on the Add button creates a new schedule entry for this project or the server.
Clicking on the Edit button (or double-clicking on the desired schedule entry) allows the user to edit the selected schedule entry. A new dialog with the corresponding input screen opens.
Clicking on the Delete button deletes the selected schedule entry from the project or server. A confirmation prompt must be confirmed before deletion. The (yellow) system schedule entries cannot be deleted.
Clicking on the Execute button allows for immediate manual execution of the desired schedule entry, regardless of the configured execution interval.
The Copy schedule entry button is used to copy a schedule entry from a different project and add it to the current project or to the server-wide schedule entries.
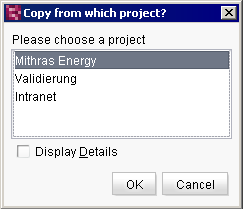
Selecting a project
The first step is to select the project from which an existing schedule entry will be copied. The selection dialog shows all projects on the server for which the logged in user is registered as a project administrator.
In the next step, a new dialog appears that lists all schedule entries of the selected project.
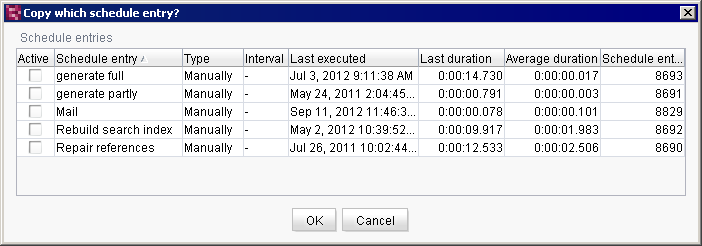
Selecting the schedule entry to copy
Double-clicking on a single schedule entry copies it from here to the edited schedule entry.