

Creating and editing content
Adding external content to the import project
The first task is to transfer the HTML templates supplied by the agency into the import project via the start dialog box (see Preparatory tasks – Add HTML content).
However, HTML content can also be added at any time by using the tool bar buttons on the left-hand side of the window:
![]() Clicking the Select HTML file button opens a file selection dialog (the root directory of the import project is selected by default).
Clicking the Select HTML file button opens a file selection dialog (the root directory of the import project is selected by default).
![]() Clicking the Select URL button opens a dialog box for passing a URL.
Clicking the Select URL button opens a dialog box for passing a URL.
In the case of both dialogs, the selected HTML structure is transferred into the import project when you confirm the dialog.
An imported HTML structure contains references to (simultaneously supplied) images and files or to external references. Where possible (see Restrictions), this content is automatically transferred to the import project when an HTML structure is added. During the next step, you can use a preview function (“Edit entry”) to analyze and structure the imported HTML structure in the template wizard.
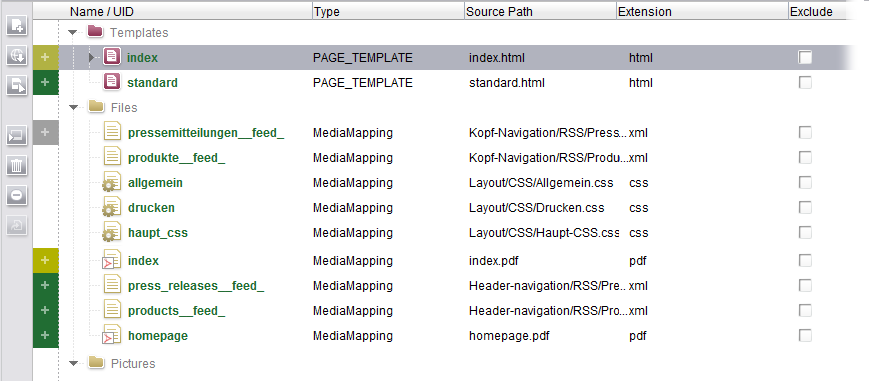
Once it has been added, the internal or external content is displayed on the overview page of the template wizard. The HTML file is listed as an element of the PAGE_TEMPLATE type. The referenced images and files are displayed in the overview under the “Pictures” and “Files” directory structures.
Opening the preview in the template wizard
Analyzing an existing HTML structure
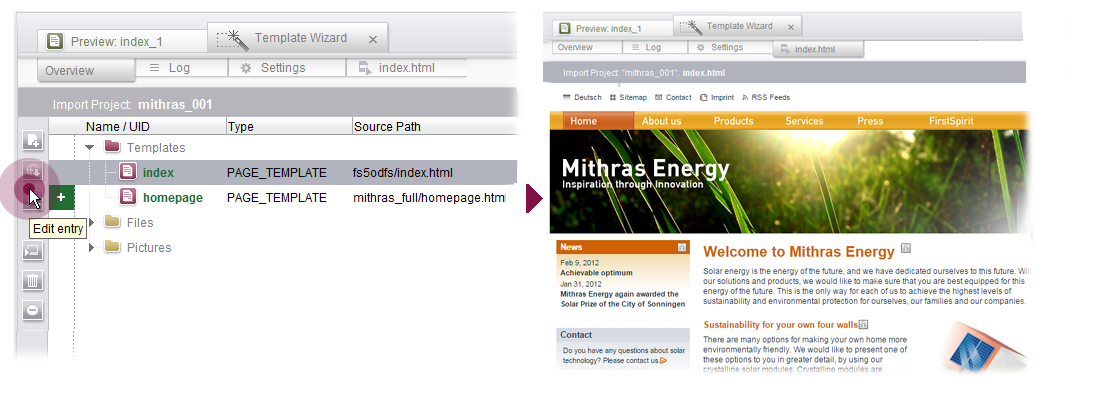
The next step is to analyze the HTML file. To do this, select the required entry in the overview.
![]() Click the Edit entry button to open a new tab in the template wizard that shows an HTML preview for the selected entry.
Click the Edit entry button to open a new tab in the template wizard that shows an HTML preview for the selected entry.
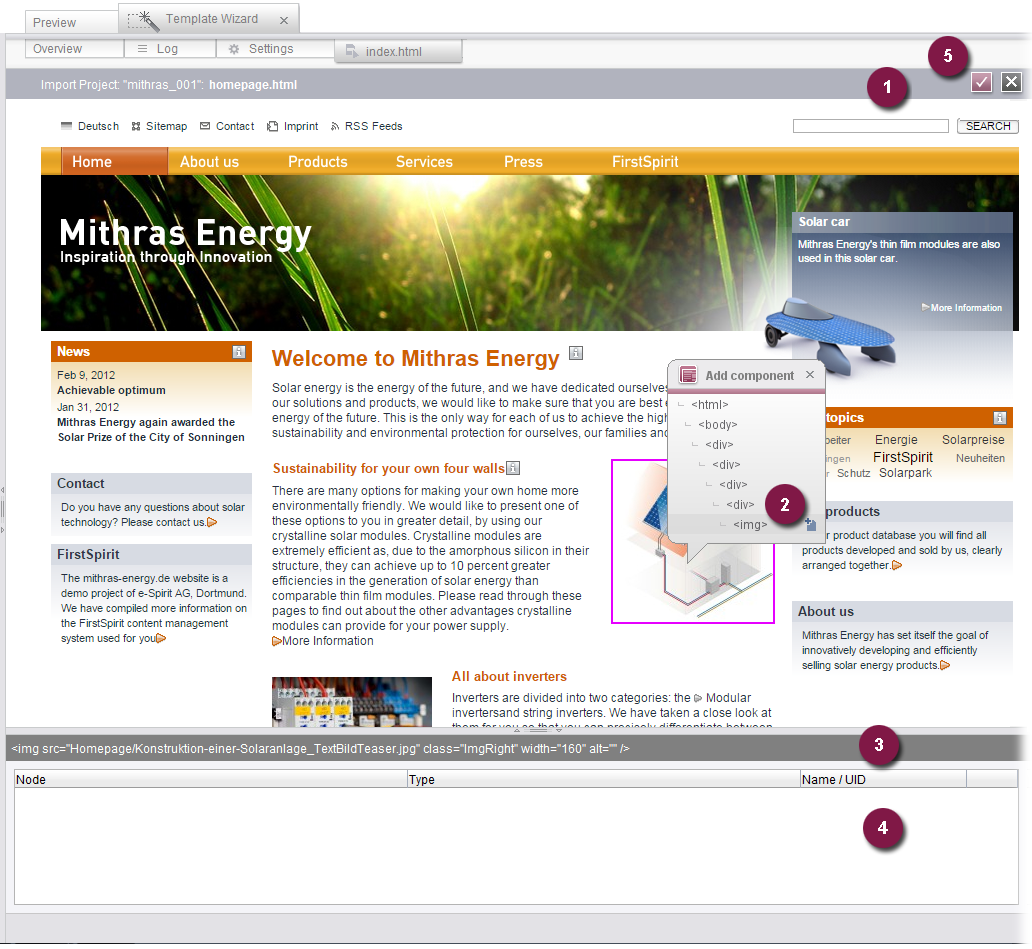
Within this HTML preview (1) the HTML structure can now be broken down into its individual components:
Creating components
Generating FirstSpirit templates and input components from the HTML structure
Click inside the preview to display an overlay window (2), which shows the HTML structure of the page at the relevant location (multiple selection is possible by keeping the Strg key pressed at the same time; for an example, see Creating content areas).
Starting from the point you have clicked on, all the higher-level HTML elements in the hierarchy are displayed right back to the root node. If you hover the mouse pointer over the overlay window entries, a frame appears to highlight the relevant area in the preview. In addition, the information bar (3) shows the start tag for the HTML area.
Click an entry to create a FirstSpirit component from the relevant element, e.g., an HTML image tag (in this particular case: an image input component). Once the new image input component has been created, it appears in the list view (4) at the bottom of the window:

All the elements in this area are then visible on the Overview tab as well.
All the areas of the page that have already been selected and saved are then highlighted by means of a green frame.
The HTML preview can be used to create various components (including input components, content areas, section templates, etc.). For examples of how to create the individual types, please refer to the relevant sections.
- PAGE_TEMPLATE: Rather than being created specifically via the preview, FirstSpirit page templates are generated automatically by the template wizard as soon as an external HTML structure is added to the import project (either via the start dialog box or via the tool bar buttons).
However, only the HTML structures are transferred to the relevant template set at this early stage. It is only in the course of further editing (i.e., when the relevant content areas, section templates, and input components are defined under this page template) that the element becomes a FirstSpirit template with the corresponding form definition and necessary FirstSpirit template syntax. - BODY: See Transferring content areas
- SECTION_TEMPLATE: See Creating section templates
- LINK_TEMPLATE: Imported as a FirstSpirit link template
- RENDER_TEMPLATE: Imported as a FirstSpirit format template
- INPUT_COMPONENT: See Creating forms
- MediaMapping: Imported as a medium (image or file) into the FirstSpirit media