

Mapping the structure
The editor is controlled either by using the tool bar or via a context menu that can be activated anywhere in the editor.
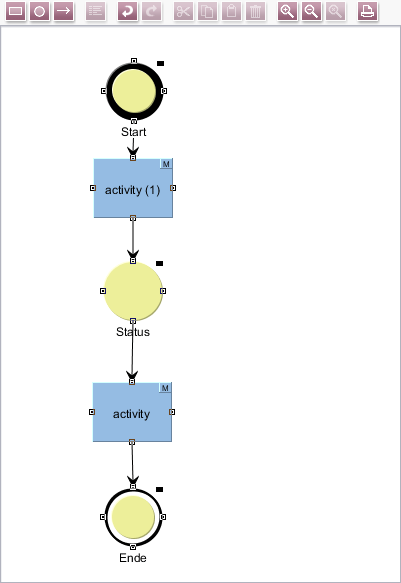
Your next task is to map the structure shown on the right (i.e. the work steps and connections between them) in the workflow editor.
Here are some tips on how to design a workflow model (also refer to the Operating assistance page in the “Templates (Basics)” Chapter):
- If a new activity/status is added after an existing one has been selected, a transition is automatically inserted between the two elements.
- The status and activity can simply be moved to the desired location using the mouse. The added transitions automatically follow these elements.
- To make the model layout clearer, you can grab the starting or end point of a transition with the mouse and reconnect it to the status or activity on a different side.
- The connection points must actually touch the status or activity (otherwise the transition is highlighted in red).
- To turn a transition 90 degrees, you can add a support point. To do this, right-click on the transition and then move the support point to the desired spot.