Configuring workflow steps
Once the workflow structure has been defined, the properties must be specified for the individual workflow steps. For example:
- Who should be able to start the workflow or switch the respective step?
- Should the relevant object be write-protected during the respective step?
- Should a notification be issued when the respective step is reached?
This can either be configured via the relevant Properties dialog (double-click an element) or via the Properties view. This view shows all the settings for the element at a glance.
The Properties dialog can also be accessed via the tool bar or the context menu:
- For the properties of a status
- For the properties of an activity
- For the properties of a transition
General
A descriptive and meaningful display name should be assigned for each workflow element. These names are displayed to the editor on buttons and in window titles when the workflow is run.
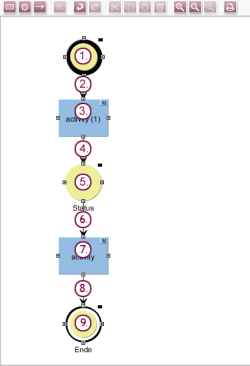
The following properties should be set for the workflow steps:
- Start status
Type: Start (Set editor(s) automatically based on permissions)
This means that the editors are defined automatically by the permission configuration. - First transition
Fixed permissions: Enable
User: Everyone - First activity
EN display name: “create task” - Second transition
EN display name: “Assign”
Fixed permissions: Enable
Users: Everyone - Second status
EN display name: “task” - Third transition
EN display name: “Edit”
Fixed permissions: Enable
Users: Everyone - Second activity
EN display name: “execute task” - Fourth transition
EN display name: “Finished”
Fixed permissions: Enable
Users: Everyone - End status
EN display name: “task finished”
Type: End


