

Creating a new workflow model
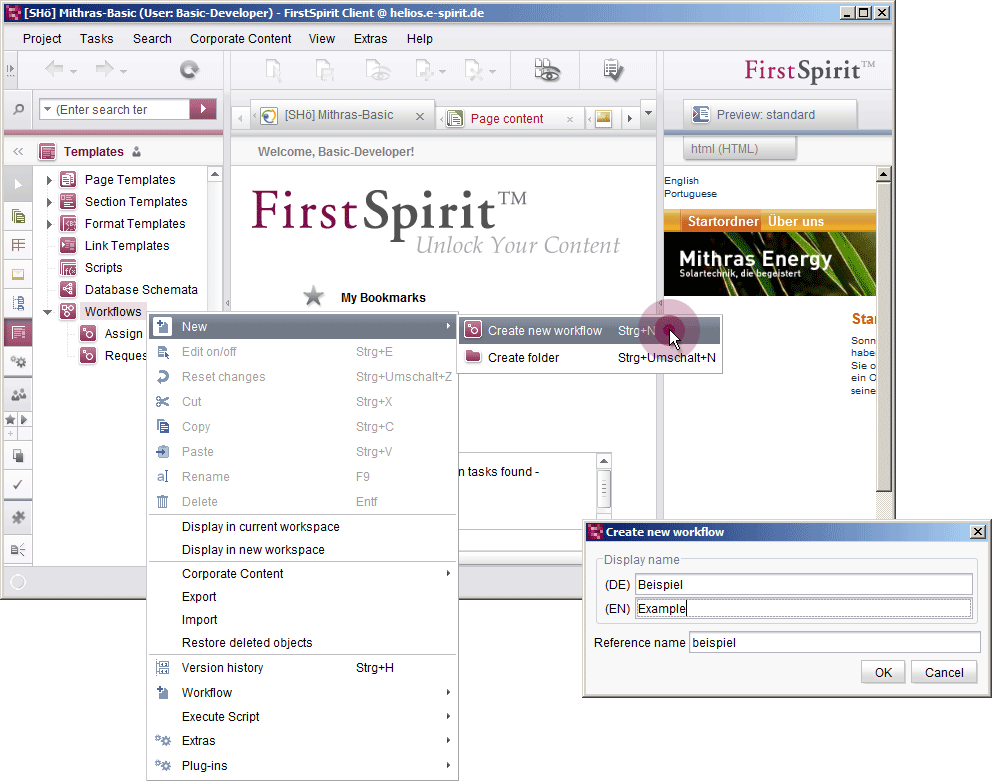
To create a new workflow, right-click on the “Workflows” area in the Template Store. Select New - Create new workflow from the context menu, and in the window that appears enter a unique reference name and display name for the two defined editorial languages. The editor sees the display/reference name when the workflow is started. Therefore, the names should be descriptive and meaningful.
Once a new workflow has been created, it appears in the tree structure directly underneath the “Workflows” node. Editing mode is always activated for new workflows immediately.
Various tabs are provided in the editing area so that the workflow can be edited (see Workflows in “Templates (Basics)” Chapter).
The State diagram tab offers a graphical editor. This editor can be used to model the required workflow steps, the order in which they should be performed, and the responsible parties, etc.
By default, a new workflow contains a start status with a transition to the first workflow activity and an end status.
A description of how to model a workflow can be found on the pages that follow.