Analyze Assistant
 |
The configuration of FirstSpirit AI is mandatory for the use of the Analyze Assistant. |
| Table of contents |
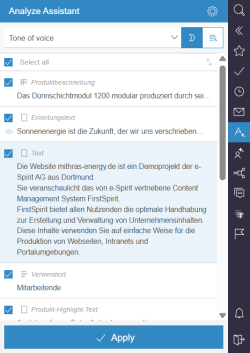
Within the ContentCreator, the Analyze Assistant identifies text-related issues on the displayed page and provides instant solutions.
The configuration of FirstSpirit AI is mandatory for using the Analyze Assistant.
Handling
The Analyze Assistant is an integral part of the ContentCreator. After the initial set-up, you can start the analysis in the report on the right.
Page analysis
The Analyze Assistant evaluates the currently open page using criteria defined in the prompt and, if instructed, corrects the identified text issues.
 |
The Analyze Assistant currently only supports the analysis of content projections consisting of a single dataset. The analysis of content projections consisting of more than one dataset is not possible. |
- Open the Analyze Assistant report:

- In the dropdown, select a prompt. The analysis starts automatically.
→ The page is analyzed based on the selected prompt. Any proposed changes are listed in the report.
→ Report entries can be applied, edited or discarded before the full analysis is finished. - Optional: To re-run an analysis click
 .
.
 |
Click |
- Check all list entries manually. If you want to apply a proposed change, select the entry:
 .
. - Alternatively: Use the Select all-checkbox to select all list entries.
- Optionally: Click Apply.
→ The changes for all selected entries are applied.
 |
If you apply the proposed changes in bulk, they cannot be reversed for all elements at once. Instead, you need to select and apply each element's previous state in the project history. |
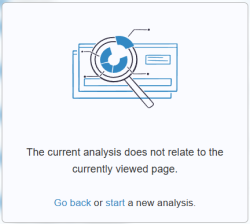
If you have conducted a page analysis and then navigate to another page, you have the option to return to the previous page to avoid discarding the analysis results of the previous page or to start a new analysis for the current page.
Checking proposed changes
After a page is analyzed, all list entries are automatically selected, and the proposed changes can be immediately applied. However, we recommend to manually check each list entry.
You can reverse the order of the list entries by clicking  .
.
Position of featured element
- With the mouse, hover over an entry.
→ The featured element is highlighted on the displayed page if currently visible. - Click on
 to directly jump to the featured element.
 |
If an entry cannot be visually highlighted, the |
Comparing current state and proposed changes
Each list entry shows a single-line preview of proposed changes.
- Click on the text in the entry.
→ The text is expanded.
To evaluate proposed changes in detail and make edits if needed, you can view them in a detail window.
- In the entry's EasyEdit toolbar, click
 .
.
→ A pop-up window opens. - In the pop-up window, you can view the proposed changes in one of the following views:
 Combined view: The initial text and the proposed changes are displayed in the same text field.
 Compare view: The initial text and the proposed changes are displayed in two text fields side-by-side.
 Preview: Only the proposed changes are displayed.
- Optionally: Click
 in the pop-up window.
→ The proposed changes are displayed in the element's form. - Optionally: In the Combined view or the Compare view in the pop-up window, click on the initial text.
→ The proposed changes are discarded. - Click Save Draft to save your edits to the proposed changes.
→ Your edits to the proposed changes are saved. The proposed changes are not applied yet. - Alternatively: Click Apply Changes.
→ The proposed changes are applied immediately and are instantly visible on the page. The entry is deleted from the list.
Editing
- In the entry's EasyEdit toolbar, click
 to edit proposed changes.
→ Proposed changes are displayed in the element's form. - If you make edits to a proposed change, confirm this with Save.
→ Your corrections to the proposed change are saved. The proposed change is not applied yet.
Discarding
- In the entry's EasyEdit toolbar, click
 to delete the entry.
→ The entry is deleted from the list.
This has no impact on the element.
 |
If proposed changes for a given element are discarded, it can happen that another suggestion for the same element will appear when you run an analysis later. |
Prompt configuration
You can edit or add new prompts directly in the ContentCreator.
 |
You can also configure prompts in the ServerManager. You can find basic information about the prompt configuration of the FirstSpirit AI Assistant Suite in the FirstsSpirit AI documentation,, which is strictly necessary for understanding the subsequent instructions. |
As a server admin, you can edit all prompts.
As a project admin, you can edit shared and project prompts, but not global prompts.
 |
For more details on the distinction between global, shared, and project prompts, see here. |
List of operations
You can view a list of all operations available in the FirstSpirit AI Suite directly in the ContentCreator:
- Open the Analyze Assistant report.
- Click the Settings button.
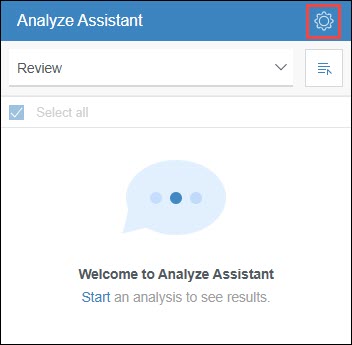
→ The AnalyzeAssistant window opens. Here you can see a list of all operations available in the FirstSpirit AI Suite.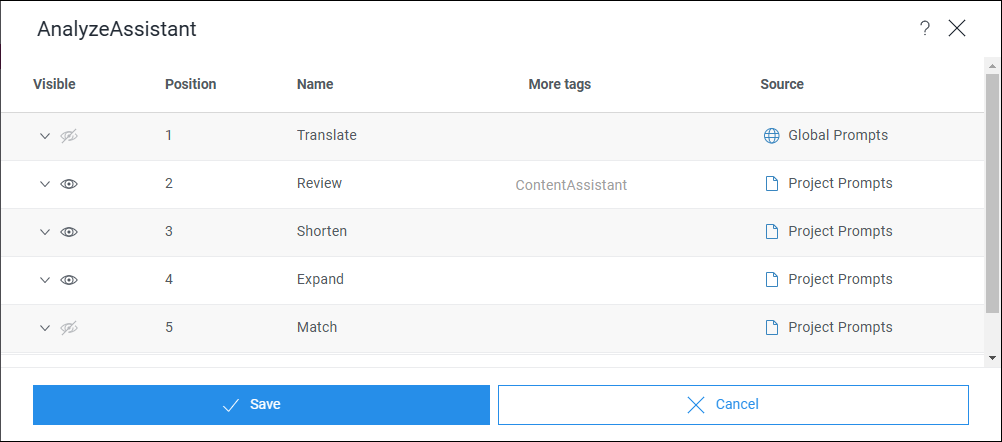
The list of all AI Suite operations provides the following information:
- Visible: Indicates whether the tag "AnalyzeAssistant" has been set for the respective operation.
- Position: Describes the order in which operations are displayed in the respective assistants.
- Name: Shows the name of an operation, which is also displayed to the end user in the respective assistant.
- Additional Tags: Indicates whether additional tags have been assigned to the operation. If the column for an operation is empty, this operation is used only in the AnalyzeAssistant.
- Source: Describes the level at which the operation was created and by whom it can be edited, i.e., default, global, shared, or project-specific.
You can perform the following actions in the AnalyzeAssistant window:
- Creating an operation
- Editing an operation
- Changing the visibility of an operation
- Moving an operation
- Duplicating an operation
- Sharing an operation
- Deleting an operation
Managing individual operations
You can edit Analyze Assistant operations directly in the ContentCreator via the Analyze Assistant report:
- In the Analyze Assistant report, select an existing operation from the dropdown menu.
- Click the Edit prompt button.
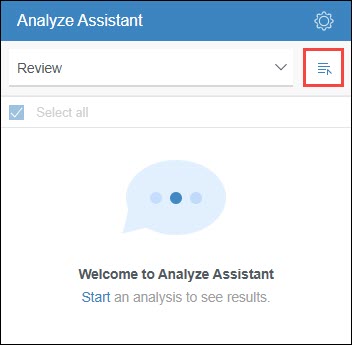
→ The Edit operation window opens where you can edit the operation.
You can perform the following actions in the Edit operation window:


