

Changing project properties
The fourth step is to change a few project properties for the Mithras-Basic project.
To do this, select Properties from the Project menu. A new window will then appear where all the settings can be configured.
(Alternatively, the project properties can also be opened by double-clicking on the project name.)
Users
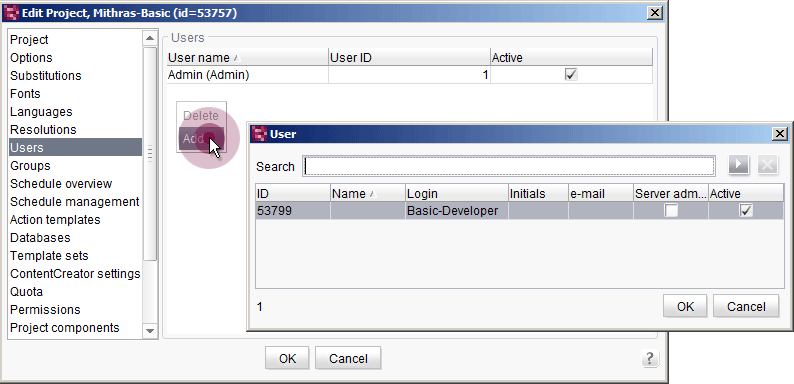
The newly added user Basic-Developer now needs to be added to the user list for this project.
To do this, select the Users area in the project properties. Then right-click on the right section of the window to open the context menu and select Add from the menu list. In the window that appears, select the user named Basic-Developer from the user list.
The Basic-Developer is now registered as a user for our test project.
Groups
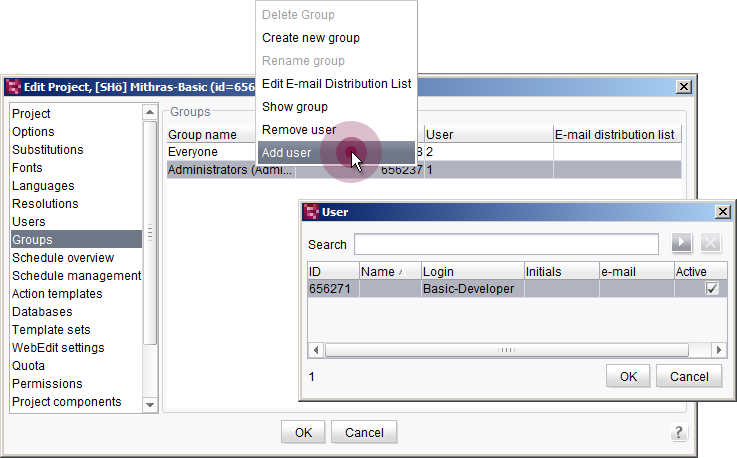
The next step is to add the Basic Developer user to the group of administrators.
To do this, select the Groups area in the project properties. Now right-click on the Administrators entry in the right-hand section of the window to open the context menu. Select Add user from the context menu.
In the window that appears, select Basic-Developer from the user list to make the user a project administrator.
Languages (project languages)
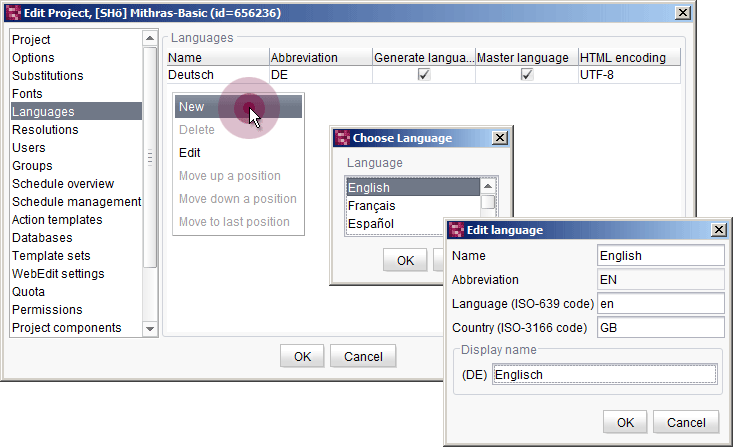
The next step is to add two additional languages to the project.
To do this, select the Languages area in the project properties. Then right-click in the right-hand section of the window to open the context menu and select New from the menu list.
In the window that appears, select English (EN) from the list of languages and in the next window confirm the prompt for generating the language channel by clicking Yes.
Option (Configure editorial languages)
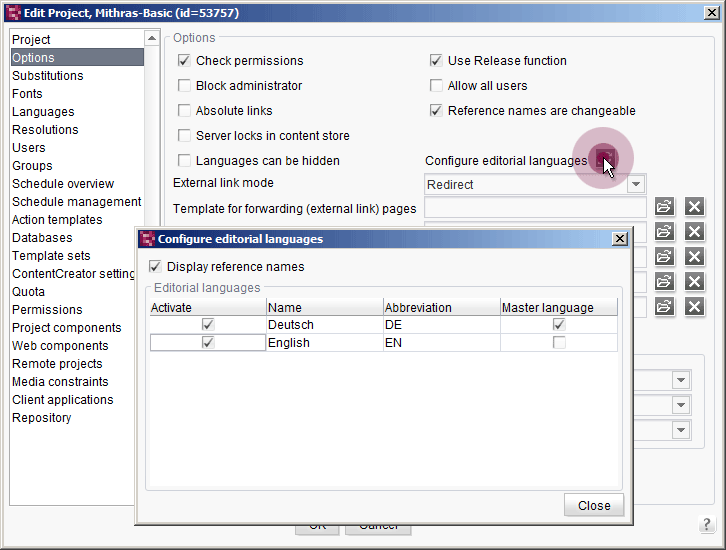
The next step is to add an editorial language to the project.
Select the Optionsarea in the project properties. Then select the Configure editorial languages icon in the right-hand section of the window.
In the configuration dialog that opens, select German (DE) and English (EN) as the editorial languages.
Resolutions
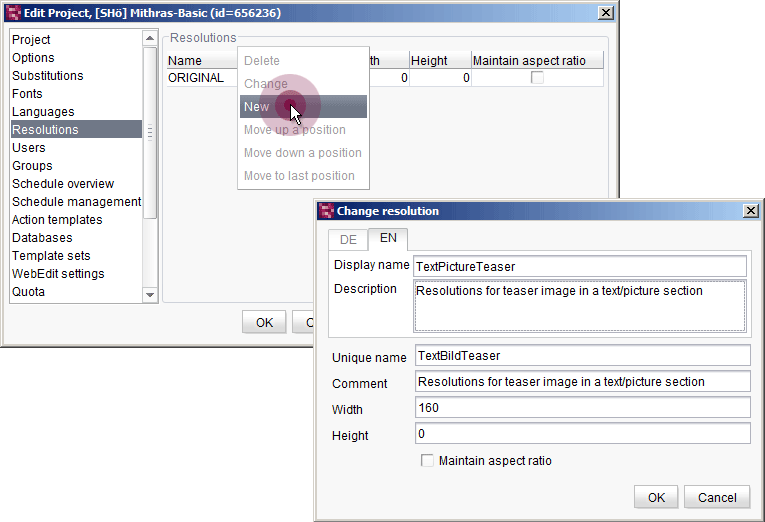
The next step is to add another resolution to the project.
To do this, select the Resolutions area in the project properties. Then right-click in the right-hand section of the window to open the context menu and select New from the menu list.
In the window that appears, enter TextBildTeaser for the display name and define the resolution width as 160 pixels.
Defining resolutions is described again in more detail under Defining resolutions in Working with media.
Close and save the project properties by clicking OK. Now close ServerManager.