

Introduction / Permissions in FirstSpirit / Editorial permissions / Permission assignment in SiteArchitect
Permission assignment in SiteArchitect
| Table of contents |
Editorial permissions for groups and users are defined within the stores in SiteArchitect.
Use the tree view in the left-hand part of the window to select a subarea of the project for which permissions are to be defined. The highest object to which the changes are to apply is always selected. The permissions set here are inheritable, i.e., they are passed on to all the objects below the selected object.
The “Extras/Change permissions” function is now called on the selected object via the content menu. This opens the dialog for permission assignment:
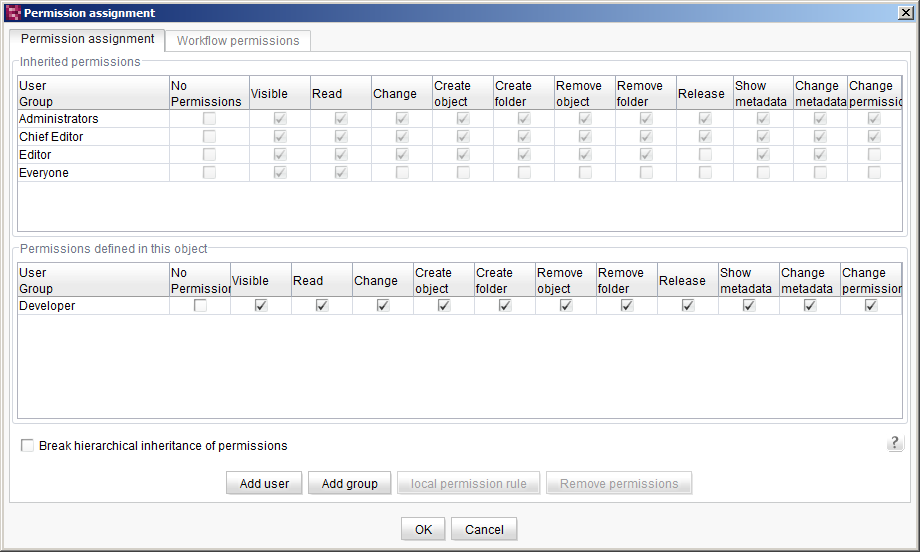
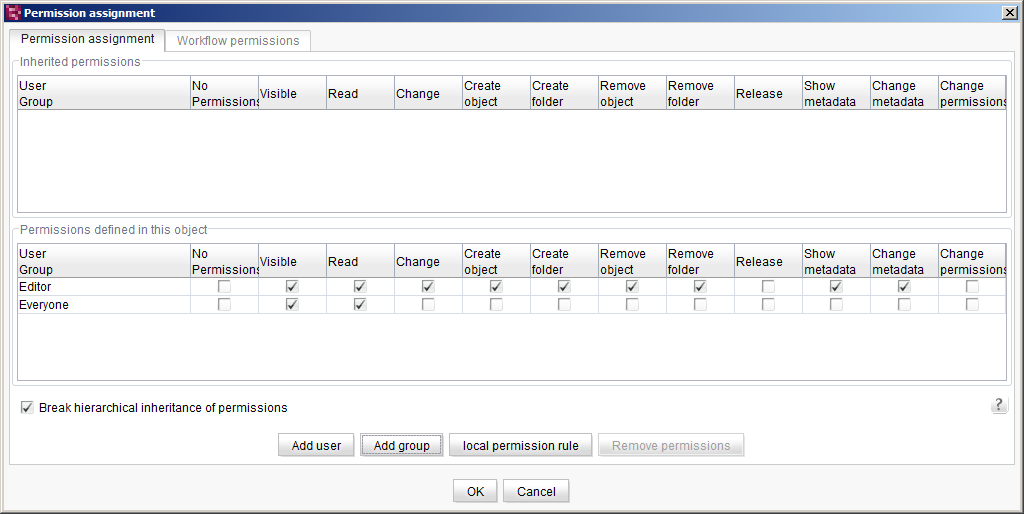
Permission assignment dialog – “Permission assignment” tab
The “Permission assignment” dialog consists of two tabs. The “Permission assignment” tab is for allocating editorial permissions, the second “Workflow permissions” tab is for allocating permissions to execute workflows and is explained.
By right-clicking  you can choose whether to display the login, name or last name and first name of the users.
![]() Click the question mark to open the Online Help.
Click the question mark to open the Online Help.
The inherited permissions on this node are shown in the top part of the “Permission assignment” tab (except on the root node of the stores). The bottom area “Permissions defined in this object” is initially empty as permissions have not yet been defined for this node.
 |
For more clarity the entries in the lists “Inherited permissions” and “Permissions defined in this object” are sorted automatically in alphabetical order. First groups and then users are shown. |
If, in addition to the inherited permissions, further permissions are defined for a group or a user, the corresponding group or user must be added to the permission definition first.
The “Break hierarchical inheritance of permissions” checkbox must be selected if the permission definition for a group or a user is to be changed. Then a question appears asking whether or not you want to adopt the inherited permissions.
Adopting inherited permissions for a node
Example - without adoption of the inherited permissions
No: If the dialog is confirmed with “No”, the permission definition for this node starts with deactivated permissions. In this case the permissions set to date for a group or user at a higher-level node are not adopted.
Example of permission definition with adoption of the inherited permissions
Yes: If the dialog is confirmed with “Yes”, the inherited permissions are adopted as a default setting:
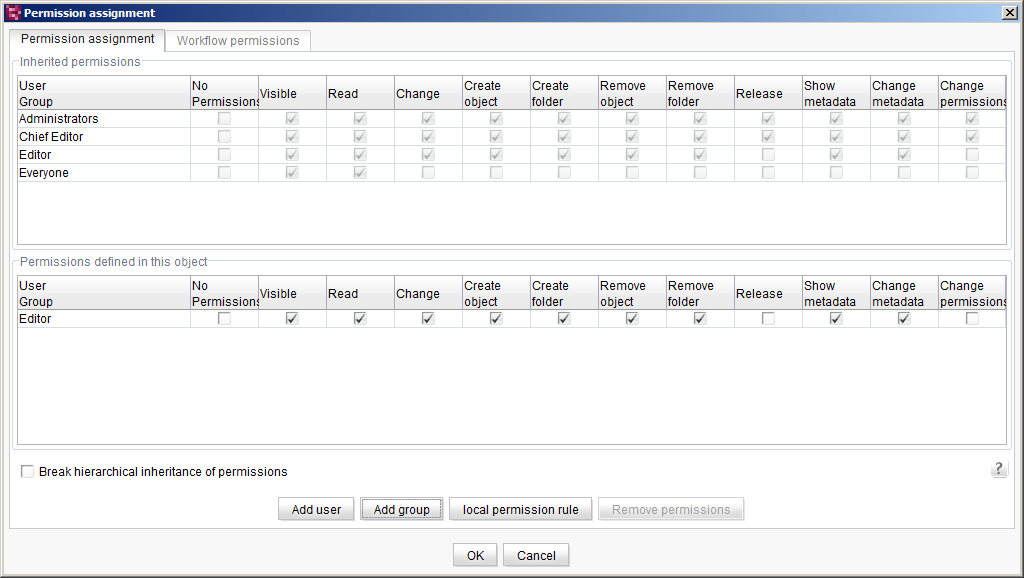
Irrespective of whether inherited permissions are adopted or not, the permissions for the selected node can now be redefined in the bottom part of the window.
The inherited permissions for a group or a user can be quickly adopted by pressing the local permission rule button.
Defining permissions for an existing group/user
A permission for a group or user can be activated or deactivated by simply clicking the relevant checkbox in the “Permissions defined in this object” area.
OK: All changes in the “Permission assignment” dialog are saved if the changed permissions are confirmed by clicking “OK”.
Cancel: Click to cancel the assignment of permissions. Permission definitions that have already been changed or deleted are not saved.
Defining permissions for a new group
If the permissions of an object are to be defined for a new group, the required group must be added using the button in the bottom part of the “Permission assignment” dialog.
Add group: Click this button to open the “Groups” dialog with a list of all project groups.
A project group can be selected from the list. Click OK to add the selected group to the “Permission assignment” dialog where it is included in the “Permissions defined in this object” area.

The permissions for the newly added group or user can now be defined.
|
If a group is added which already has inherited permissions for this node, any additionally assigned permissions are added to the inherited permissions. If permissions are withdrawn from this group but the inherited permissions are not deactivated, the permissions are still deemed to be granted – i.e., are still valid. |
If the “Everyone” group is added, the inheritance hierarchy is interrupted and all permissions, apart from the permissions for the “Everyone” group and permissions already assigned for the node concerned in the “Permissions defined in this object” area, are withdrawn.
Example for adding the Everyone group:
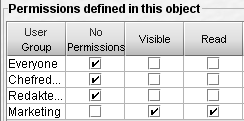
Initial configuration
Groups with inherited permissions can be found in the area “Inherited permissions”.
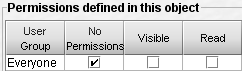
Adding the “Everyone” group.
Result
The “Everyone” group has been added.
All permissions in the “Inherited permissions” area have been withdrawn.
There are only still permissions in the “Permissions defined in this object” area.
If other groups are selected at the same time as “Everyone”, the permissions of these groups are also adopted.
|
When this action is carried out, a confirmation prompt appears informing you that the hierarchical inheritance of permissions will be broken. If it is confirmed with “Yes”, the response is as described above, if “No” or “Cancel” is selected, all selected groups except for “Everyone” are added. Therefore, if only “Everyone” was selected, no change is made if “No” or “Cancel” is clicked. |
Defining permissions for a new user
If the permissions of an object are to be defined for a new user, the required user must be added using the button in the bottom part of the “Permission assignment” dialog.
Add user: Click this button to open the “Add user” dialog with a list of all project users:
A project user can be selected from the list. Click OK to add the selected user to the lower part of “Permission assignment” dialog, where it is included in the “Permissions defined in this object” area.
Permissions can now be defined for the newly added user.
|
If a user is added who already has inherited permissions for this node, any additionally assigned permissions are added to their inherited permissions. If permissions are withdrawn from the user but their inherited permissions are not deactivated the permissions are still deemed to be granted – i.e., are still valid. |
Deleting permissions defined for this object
The permission definition of a group or user displayed in the “Permissions defined in this object” area can be deleted again. This is done by selecting the group or user to be deleted in the “Permissions defined in this object” area.
Remove permissions: Click this button to remove the permissions defined for the selected group or user.
Defining a local permission rule
local permission rule: This button can be used to quickly copy the inherited permissions of a group or user into the “Permissions defined in this object” area where they can then be modified. To this end the user/group is selected in the upper part of the window and then the button is pressed. Local changes to the permission definition can now be made in the bottom part of the window.
|
Even if the “local permission rule” is used, the inheritance still has to be noted and observed. |