Editing area for images
| Table of contents |
The editing options for language-dependent and language-independent images are identical. For language-dependent images there is a separate tab for each project language on which the same setting options are available again.
![]() This icon in the top right-hand corner can be used to set which display is to be shown for the individual resolutions. The modified settings apply to all images in the Media Store, but are only retained for the duration of the current session. The following setting options are available:
This icon in the top right-hand corner can be used to set which display is to be shown for the individual resolutions. The modified settings apply to all images in the Media Store, but are only retained for the duration of the current session. The following setting options are available:
- Display of the resolution
* List view: A list containing all resolutions
* Thumbnail: All files in this folder are displayed.
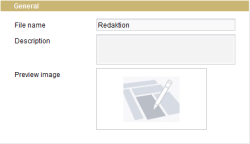
General
File name: This row automatically contains the name without the corresponding file extension under which the selected medium is stored on the server. This name can be used to link the image on the website.
Description: This field can be used to enter an explanatory comment on this image which, among other things, can be used as a tool tip on the website. The explanatory comment on the image should of course be written in the relevant language.
Preview image: A preview (thumbnail) of the current image is automatically displayed in this field. If the “integrated preview for media” has been activated, then the image is displayed in the integrated preview by clicking the preview image. Otherwise the image is displayed in a separate preview window.
List view
This area contains a list of all the resolutions defined for the project in the project settings and options for changing the current image (see Media constraints (→Documentation for Administrators)).
The “Original Resolution” row describes the original image, as can be seen in the thumbnail. In addition, the file type (here: JPG file), the dimensions (here: 320 x 262 pixels), and the file size (here: 10 KByte) are displayed.
The other resolutions are calculated automatically by the system when needed. It is also possible to upload user images at any resolution or to determine image sections.
Each edited or uploaded image will also be displayed with file type, dimensions, and file size if the image file for the crop has already been calculated by the server.
Note: The image file of a section is only calculated upon the first request and not upon the definition of the section.
In addition, the relevant state (![]() ,
, ![]() or
or ![]() ) is also provided.
) is also provided.
Above the list is a row of icons that can be used to carry out certain editing functions for the individual resolutions. These functions are described in detail in section Functions in the editing area.
The list can be sorted by a particular column by clicking its header. The column width can be expanded to make it easier to read the names of the resolutions.
Excursus: Controlling automatically generated images in projects
Image-type media can occur in different file types (such as JPEG or PNG) and resolutions (e.g. 72 dpi) in a project. Each image is stored as the file type and in the resolution it was originally uploaded with (resolution ORIGINAL).
Some actions trigger an automatic generation of new image files, depending on the original image files, for example:
- generating a preview image
- creating new resolutions
- using an automatically generated resolution
- cropping an image in SiteArchitect
This generation process can be edited per API with the custom ImageWriterParams project property.
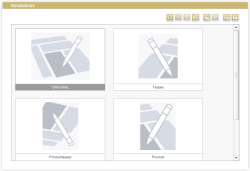
Thumbnail
This area displays all the resolutions defined for the project in the project settings as thumbnails (see the Resolutions (→Documentation for Administrators)).
The name of the respective resolution is given for each preview image. If the “integrated preview for media” has been activated, then the image is displayed in the integrated preview by clicking the ![]() preview icon. Otherwise the image is displayed 1:1 in a separate preview window.
preview icon. Otherwise the image is displayed 1:1 in a separate preview window.


